surfresearch.com.au
home
catalogue
history
references
appendix

Source Documents
                Menu
surfresearch.com.au 
  easi-bild : surfboard plans, 1953. 

 Easi-Bild : Surfboard Plans, 1953.

Easi-Bild Pattern Company:
Build it Yourself No. 247 Surfboard
Pleasantvile, New York, 1953.

Introduction
Hollow timber surfboard plans with the Easi-Bild Pattern Method of Construction.


[Cover]
There's a world of fun for those who "ride in with the waves" or "paddle under the sun" with this easy-to-build 10ft Surfboard.

No special skill is required with the Full Size Frame Patterns and Simplified Directions.
Pattern also explains how to install special "sea-scope" window for viewing marine life and spear fishing.


Before starting work, read Directions through carefully and note location of each part when mentioned.  
Study the Full Size Patterns and the Assembly Illustrations as they are referred to.  
For greater strength and rigidity, use waterproof glue at all joints.  
Dip screws and brads in glue before driving.

GENERAL DIRECTIONS

Cut BULKHEAD No. 1 to size of Pattern from 1/2" stock.   (1/2" Spruce or Pine-is figured as having a finished thickness of 7/l6". )  

Make V-cuts for ventilation and drainage as indicated.  
Cut BULKHEAD No. 2 to size of Pattern.  
Cut BULKHEADS 3, 4, 5, 6, 7, 8 the 2 5/8" width of Pattern for Bulkhead No. 5 but to lengths indicated in Illus. A.
Make V-cuts same size and distance from ends on all Bulkheads.

Cut BOW BOARD No. 9 to size of Pattern using 1" Spruce or Pine.
Cut STERN No. 10 from 1" stock   2 5/8" x 16 3/8" as indicated in Illus. A.
Cut DECK PLATE CLEAT No. 11 to size of Pattern from 1/2" stock.
Bevel forward edge as indicated on Pattern.  
Cut hole in position indicated to size required to accomodate Deck Plate available.

Cut 4 ft. x 10 ft. panel of 1/4" Weldwood* or equal Exterior Grade Fir Plywood lengthwise to make two 2 ft. x 10 ft. panels. 
Mark one panel "DECK"; mark other panel "BOTTOM".  
Mark best face of each panel as "OUTSIDE" face; keep this face outside when assembling Surfboard.

Lay Deck (with OUTSIDE face down) on a clean flat surface.
Mark CENTER LINE entire length of Deck (note Illus. A).
Mark center line on all Bulkheads and on Framing 9,  10,  11.  
With pencil, mark location of Bulkheads on Deck in locations noted in Illus. A.

Starting with Bulkhead No. 1, glue all Bulkheads to Deck.  
Hold Bulkheads in position by temporarily toenailing each end to Deck with 1" brads.  
Be sure to fasten top edge of Bulkheads to Deck as noted in Illus. B.  
Top edge of Bulkheads has only one V-cut as indicated on Patterns.  
Glue and toenail Framing 9,  10,  11 to Deck.  
Turn Panel over and nail through Deck into all Bulkheads and Framing with 1" No. 16 brads spaced about 3 inches apart.

For SIDES No. 12, clamp two 10 ft. lengths of 1/2 x 3 in position to Bow 9 and Stern 10 as shown in Illus. C and D.  
Clamp Side 12 so it fits snugly into notch in No. 9, as indicated, Side 12 is cut flush with No. 10. 
With pencil, mark location of each Bulkhead-on Side 12.
Mark outline of Sides 12 on Deck.
With pencil, mark ends of Bulkheads to conform to curve of Sides.
Remove Side 12 from clamped position.
File, plane or sandpaper ends of Bulkhead to conform to curve of Sides.

Roughly cut Deck to within 1/8" of curve of Sides.
Deck can be finished flush and rounded as indicated on Pattern 5 after Surfboard is completely assembled.

Note  Illus. D (Side View).
Measure down 2 1/4" at Bulkhead No. 2; 1 5/8" at Bulkhead No. 1 and 3/4" at No. 9. 
Mark off curved form by these points and saw both Sides to same shape.
Clamp Sides in position again to be sure they fit tight against ends of Bulkheads and other Framing.

Apply glue to all connecting surfaces between Framing, Bulkheads, Sides and Deck and screw Side to 9 and 10 with 1 1/2" No. 10 screws.
Nail Sides to ends of each Bulkhead with two penny finishing nails.
Nail Deck to Sides with 1'' No. 16 brads spaced about 3 inches apart.

Cut hole through Deck to coincide  with hole through No. 11 to size required to accomodate flush mounting of Deck Plate.
Set Deck Plate in position.

To form curved bottom, plane edges at Bulkheads 1 and 2 and face of Bow Board 9 so that Bottom Panel fits flat against them.

Give entire inside of Surfboard (except exposed edge of Sides, Bulk­heads and Framing) a coat of White Firzite*.  
Cut Bottom Panel same shape as Deck.  
Mark location of Bulkheads on outside face of Sides 12.
This permits accurately nailing Bottom to Bulkheads.

Paint inside face of Bottom Panel.
Starting at Stern, apply glue and nail Bottom panel to all framing with 1" brads spaced about 3 inches apart.

Countersink all nails and screws; fill holes with putty.
Use plane and sandpaper to round edges of Deck and Bottom all around as indicated on Pattern 5.
Sandpaper all surfaces and edges smooth.

Cut two 6'-4" lengths of 3/4" half round moulding from GRIP 13; note Pattern 5.
File and sandpaper both ends of moulding round.
Glue and nail 13 to Deck with 4 penny finishing nails driven into Bulkhead.
Stern end of 13 is nailed to Bulkhead 8 and forward end is nailed to Bulkhead No. 2.

Give entire Surfboard a coat of Firzite or equal.
Sandpaper smooth and finish with good quality marine enamel.
Follow manufacturer's directions for applying enamel used.

A piece of canvas can be cut and glued to Deck to provide a non-slippery surface.

Leave Deck Plate open when Surfboard is not in use.
This will permit inside of board to dry and will prevent dry rot.

NOTE: If plywood is not available in 10 ft. panels, you can splice smaller panels as shown in Illus. E.
Splice with a 6" wide Strip of 1/4" Plywood.
Cut strip length needed to fit between Sides 12.
Glue and clamp strip to plywood.
Center of joint should be over center of Bulk­head as indicated.
Cut this Bulkhead 1/4" less in width before glueing to Deck in order to accomodate splice.
Splices in top and bottom panels should not occur at the same Bulkhead.
One 4 ft. x 8 ft. panel and one 3 ft. x 4 ft. panel is ample for Deck, Bottom and Splices if 10 ft. panel is not available.


♦All Trade Marks Reg. U. S. Pat. Off.
Copyright 1953, Easi-Bild Pattern Company World Rights Reserved     
Printed in U.S.A.

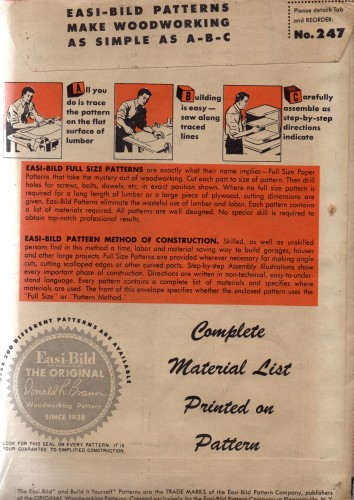
NOTICE
This pattern, or parts thereof, may not be reproduced in any
form without permission of the publisher.
The Easi-Bild "Build it Yourself" Patterns are created and
published exclusively by the Easi-Bild Pattern Company at Pleasantville, New York.


Sheet No. 1 of 1

Pattern No. 24


Easi-Bild Pattern Company:
Build it Yourself No. 247 Surfboard
Pleasantvile, New York, 1953

Return to Surfer Bio menu
surfresearch.com.au

home
catalogue
history
references
appendix

Geoff Cater (2014) : Easi-Bild : Surfboard Plans, 1953.
http://www.surfresearch.com.au/1953_Easi_Bild_247.html